Once the layers dry completely, it's time for the fun - sanding! I bought three different weights: 100, 150, and 200. I spent a lot of time sanding, and it does make quite a mess, so I was sure to put down a large sheet of paper to catch the dust. I did all of my sanding by hand, as most of the spots are not accessible with an electric sander.
 If you remember the reference image, there is an attached crest portion at the head of the staff. I wanted it to be lightweight but sturdy, so I used leftover soda case cardboard and masking tape to construct the crest.
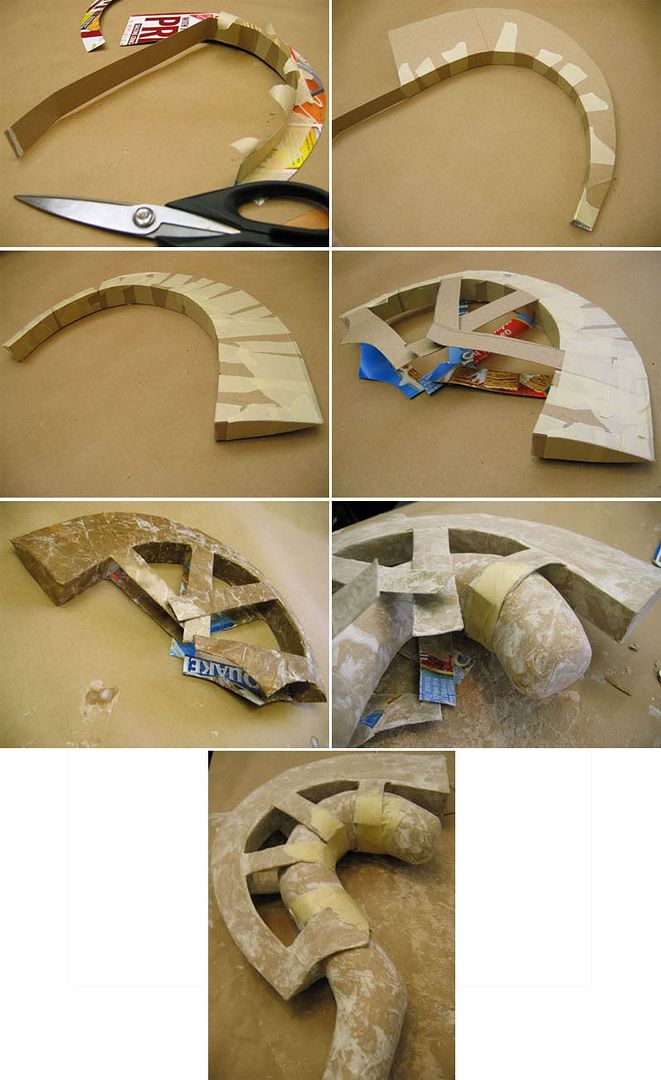
I cut out the basic shape and taped a smaller strip of cardboard along the underside. To keep the rigidity of the shape I cut pieces fit to each end and attached them securely with masking tape. Tape is your best friend!
Once the shape was to my liking I added the tabs (that I later use to attach the crest to the staff head) and went through the paper mache process yet again. After everything was dry I trimmed down the tabs and taped the crest in place on the staff.
I bet you can't guess what comes next.. if you guessed paper mache you'd be correct! Oh yes. I am up to my eyeballs in paper strips and flour-paste. The cats love it - they chase the paper all around the house and try to eat the paste when I'm not looking, much to my frustration.
 More layers of paper mache are placed on the staff to cover the tape and keep everything stuck together. Once that task has been completed, the next step is more sanding. It is important to make a smooth surface for painting on later in the process, so I was sure to be thorough with my sanding.
Once the staff was free of paper mache lines and creases, and shaped to my liking, I went back and cut through the joints. For ease of use while building and attaching the crest, I didn't cover over the joints until after I had attached the pieces. Finding the right place to cut through was half guess and half luck; I'm going to say I was rather lucky on this front. I did miss the first time, but since I used a very thin blade, the spot in which I attempted to locate the metal screw is not very noticeable. I had very few rough edges from using such a thin blade, but I did one pass with a fine grain sandpaper to make sure I had not missed anything.
That is where I left off until this afternoon. Today I am in the process of priming the staff to be painted.
 Before I started, I sanded the staff once more time for good measure. One thing to be careful of, however, is over-sanding. If you sand too much, you risk pulling up a layer or layers of paper. I had a couple small spots with this, but they were easily trimmed off and sanded smooth.
After the surface looked smooth and free of rips, wrinkles, or tears I got out the gesso.
For anyone who is wondering what the heck gesso is; Gesso is a painting supply which can be found at most art stores. It is basically a primer. One does not necessarily NEED gesso, but it is definitely recommended. It gives a nice solid base on which to paint and it helps to keep some paints from bleeding through. I am not sure how well the paints I plan to use will work on paper mache as a base, so I opt to use gesso.
That is all the progress I have to share at this point, but I do hope to start painting soon. The staff will probably end up with two coats of gesso before it gets any paint.
No comments:
Post a Comment